기술노트
| [Linux] CentOS 7 Oracle 11gR2 설치 | |
|---|---|
| 작성자 : 관리자(jieun@ehostidc.co.kr) 작성일 : 2018-06-22 조회수 : 5935 | |
|
OS : CentOS 7.4 DB : Oracle 11gR2 (linux.x64_11gR2_database_1of2.zip,linux.x64_11gR2_database_2of2.zip) 전제 사항 : 리눅스 서버 X-windows 환경에 접속 가능 (xrdp / vnc / x-manager 등등)
1. oracle 설치 관련 의존성 패키지 설치 [root@ehostidc oracle]# yum install binutils elfutils-libelf elfutils-libelf-devel gcc gcc-c++ glibc glibc-common glibc-devel glibc-headers ksh libaio libaio-devel libgcc libstdc++ libstdc++-devel make sysstat unixODBC unixODBC-devel glibc-static.x86_64 glibc-static.i686 pdksh 관련 패키지(설치 안해도 동작은 함) rpm -Uvh ftp://ftp.pbone.net/mirror/archive.download.redhat.com/pub/redhat/linux/7.0/en/os/i386/RedHat/RPMS/pdksh-5.2.14-8.i386.rpm --nodeps
2. 커널 파라미터 설정 [root@ehostidc oracle]# vi /usr/lib/sysctl.d/00-system.conf #해당 부분 # 처리 # Disable netfilter on bridges. 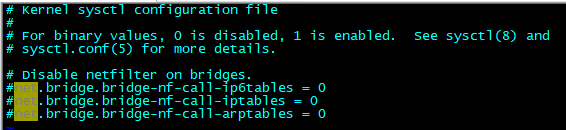
[root@ehostidc oracle]# vi /etc/sysctl.conf net.ipv4.ip_local_port_range = 9000 65500 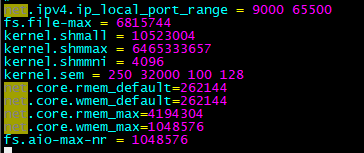
커널 파라미터 적용 [root@ehostidc oracle]# sysctl -p
3. 그룹 및 사용자 추가 [root@ehostidc oracle]# groupadd -g 200 oinstall [root@ehostidc oracle]# groupadd -g 201 dba [root@ehostidc oracle]# useradd -u 440 -g oinstall -G dba -d /home/oracle oracle [root@ehostidc oracle]# passwd oracle
4. 환경 설정 파일 [root@ehostidc oracle]# vi /etc/pam.d/login
oracle soft nproc 2047 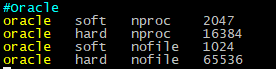
[root@ehostidc oracle]# vi /etc/profile
[root@ehostidc oracle]# vi /home/oracle/.bash_profile export ORACLE_BASE=/home/oracle/app export ORACLE_SID=ehost 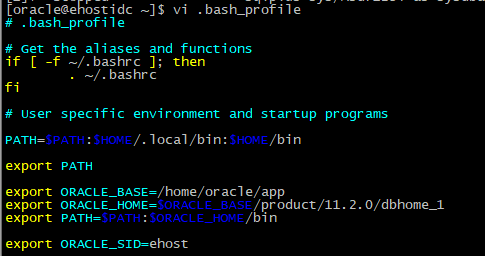
5. 폴더 생성 [root@ehostidc oracle]# mkdir /home/oracle/app
6. oracle DB 업로드 및 압축 해제 후 소유자 변경 [root@ehostidc oracle]# chown -R oracle:oinstall /home/oracle
7. oracle 계정으로 x-windows 접속
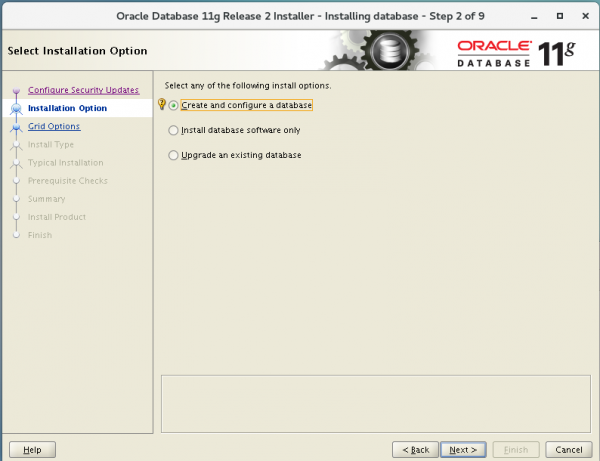
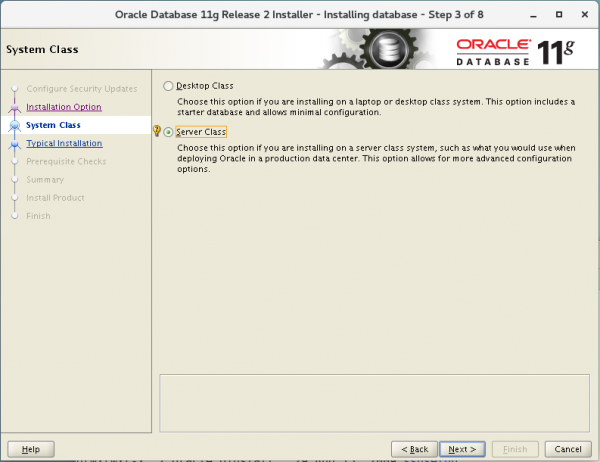
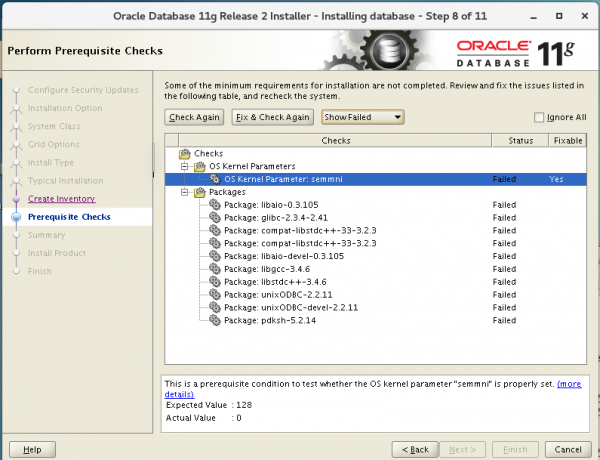
8. DB 설치
이메일 경고 무시 가능 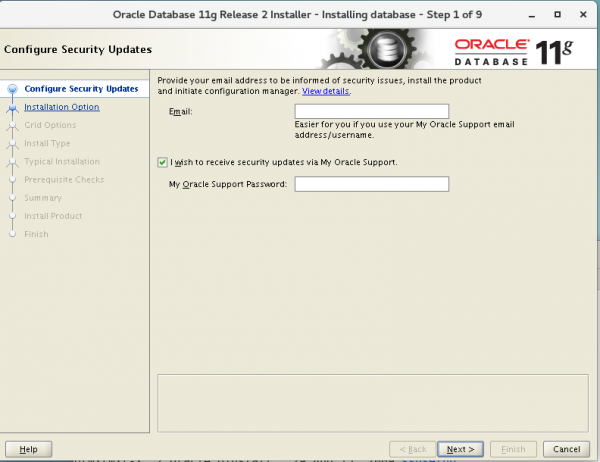

 Global database name 입력 : oracle 변수의 SID 값 DB 패스워드 입력

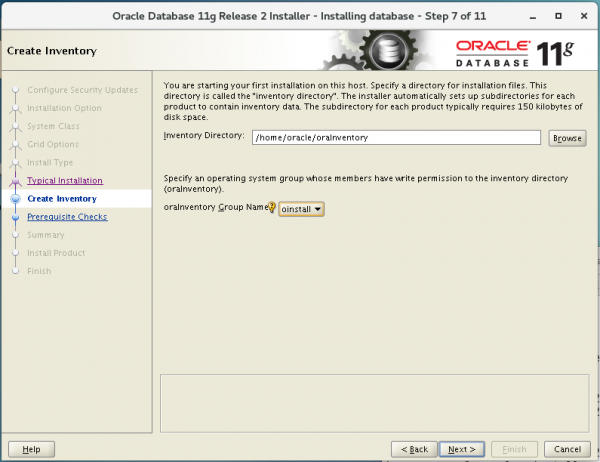
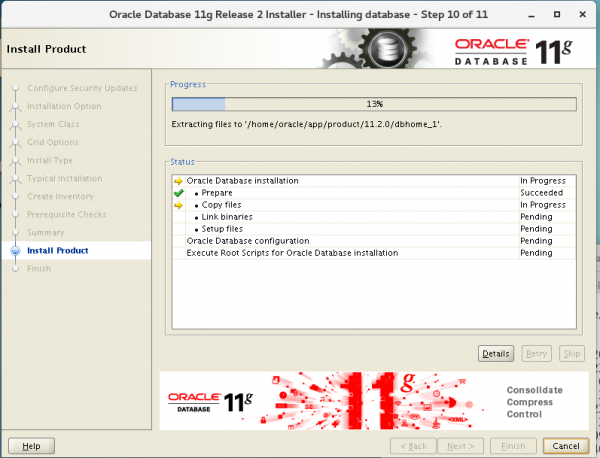
설치 완료 후 root 계정에서 아래의 스크립트 실행 /home/oracle/oraInventory/orainstRoot.sh
9. 서비스 등록 [root@ehostidc oracle]# vi /etc/init.d/oracle # /etc/init.d/oracle export ORACLE_BASE=/home/oracle/app 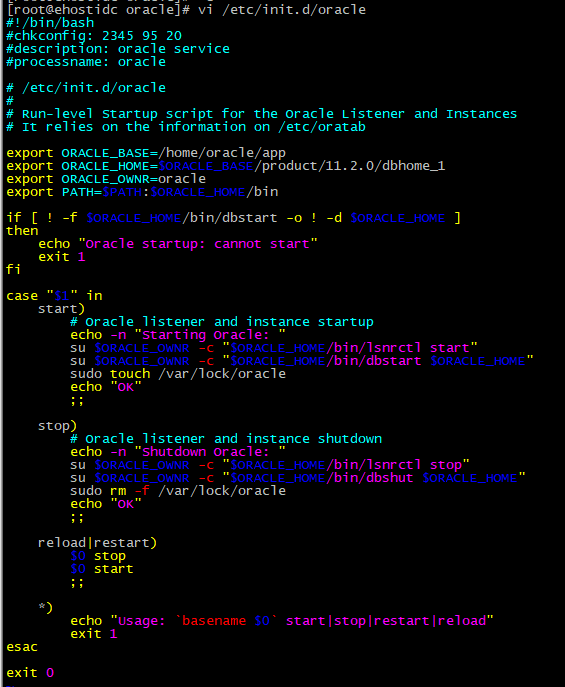
[root@ehostidc oracle]# chmod 755 /etc/init.d/oracle [root@ehostidc oracle]# chkconfig --add oracle --level 0356 [root@ehostidc oracle]# vi /etc/oratab ehost:/home/oracle/app/product/11.2.0/dbhome_1:Y
10. 서비스 확인 [root@ehostidc oracle]# su - oracle [oracle@ehostidc ~]$ sqlplus sys/PASS as sysdba |
|
| 이전글 | [Windows] 원격데스크톱 연결시 "CredSSP 암호화 Oracle 수정 때문일 수 있습니다 "오류 |
| 다음글 | [Linux] 원격데스크탑으로 CentOS 6 X-Windows 환경 사용하기 |